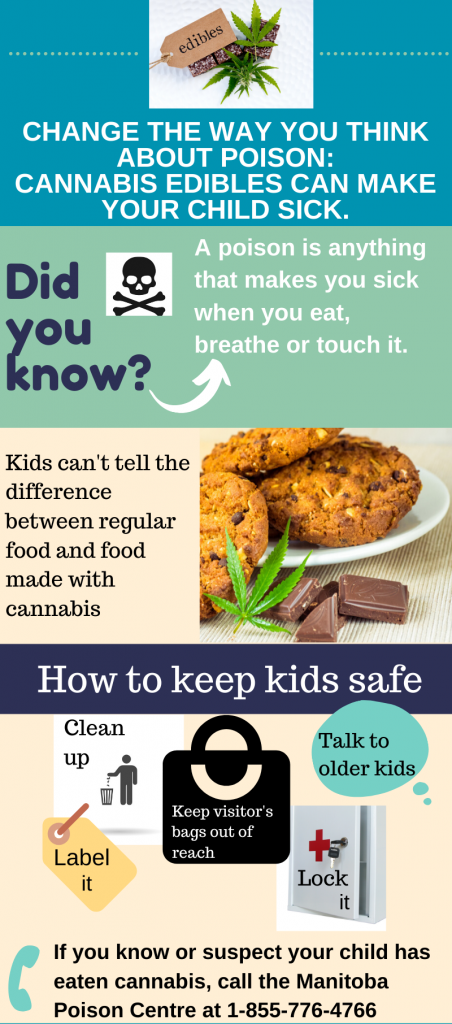
Cannabis in any form is toxic to children. Parents who use cannabis need to be aware of the risks. Since edibles look like regular food (gummy bears, brownies, lollipops, cookies), children can’t tell the difference. They need to be protected. Parents who use cannabis need to be aware of the risks to their children. These include:
Poisoning
It is important that children do not eat cannabis. It can make them very sick and put them at risk of poisoning or overdose.
Smaller children are at higher risk of poisoning because of their size and weight.
Kids love to watch and copy what their parents do. Whether using cannabis as medicine or for recreation, avoid consuming it in any form in front of children.
Lock it up
Parents should keep cannabis out of the sight and reach of children, if possible, in a locked cabinet. Invest in a safe, a lock box, a locking bag or have a lock put on a cupboard. It is best for any poisonous products to be stored “out of sight and locked up tight.”
Store your guests’ purses, coats or bags that have cannabis products in a secure (locked) place while they are in your home.
Label it
Keep all medicine and other drugs in their original, child-resistant packaging. If it is not in its original packaging, make sure to label it.
Clean it up
Put cannabis products away after every use, even if you plan on using it again later.
Always throw away waste products like ashes, unfinished joints or pieces of edibles.
If you use a babysitter, ensure they are mature, responsible and recommended by someone you trust. Ask them not to bring cannabis, alcohol or any other harmful substances into your home.
Make sure teens and friends are aware of the danger of cannabis to young children. Share this article with them.
Second-Hand Cannabis Smoke
Second-hand cannabis smoke may cause some of the same health problems as second-hand tobacco smoke. It is harmful for everyone, especially pregnant people, babies and young children.
Children exposed to second-hand cannabis smoke are being exposed to the active chemical THC. The THC enters your child’s body where it can remain for weeks.
Cannabis smoke can affect babies’ and young children’s alertness, understanding and judgement.
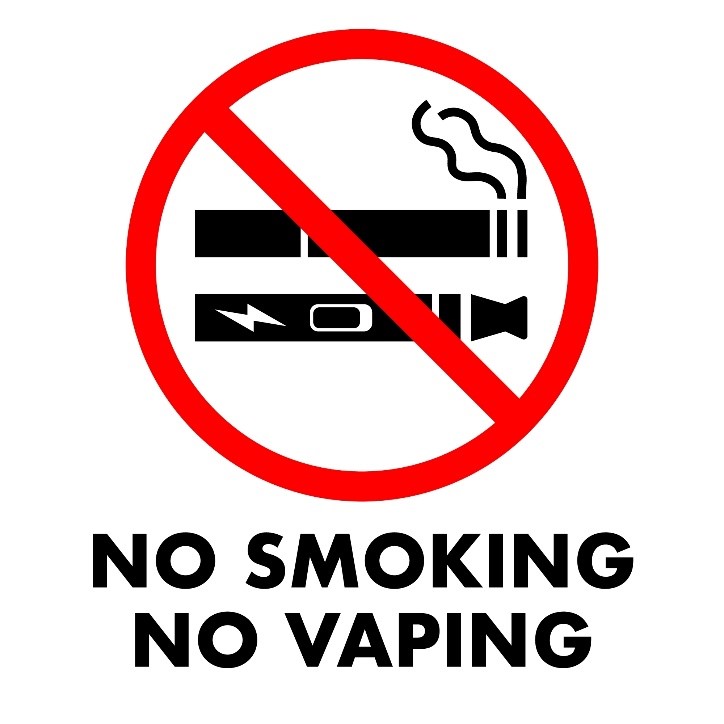
It is best to avoid smoking or vaping anything around your baby or children.
Parenting your Kids:
Using cannabis can reduce your ability to pay attention, make decisions and react to emergencies. This can affect your ability to respond to your child’s needs and keep them safe. You may not notice if your child:
is in danger
needs medical attention. If you are impaired, you will not be able to drive your child for care.
needs to be comforted
shows cues for hunger
needs to connect, play and learn
When you consume cannabis edibles, the effects are delayed (up to two to three hours for some people) and you may end up taking more cannabis than you planned. Consuming cannabis in foods or drinks can make people feel higher than expected and the effects can last for several hours or sometimes days.
Safety tips:
To ensure your child’s safety always have a plan in place.
Be sure that there is always someone available who is not high to take care of your child.
Impaired Driving
Like alcohol, cannabis affects your judgment and ability to drive. No one should ever drive impaired. Know the law.
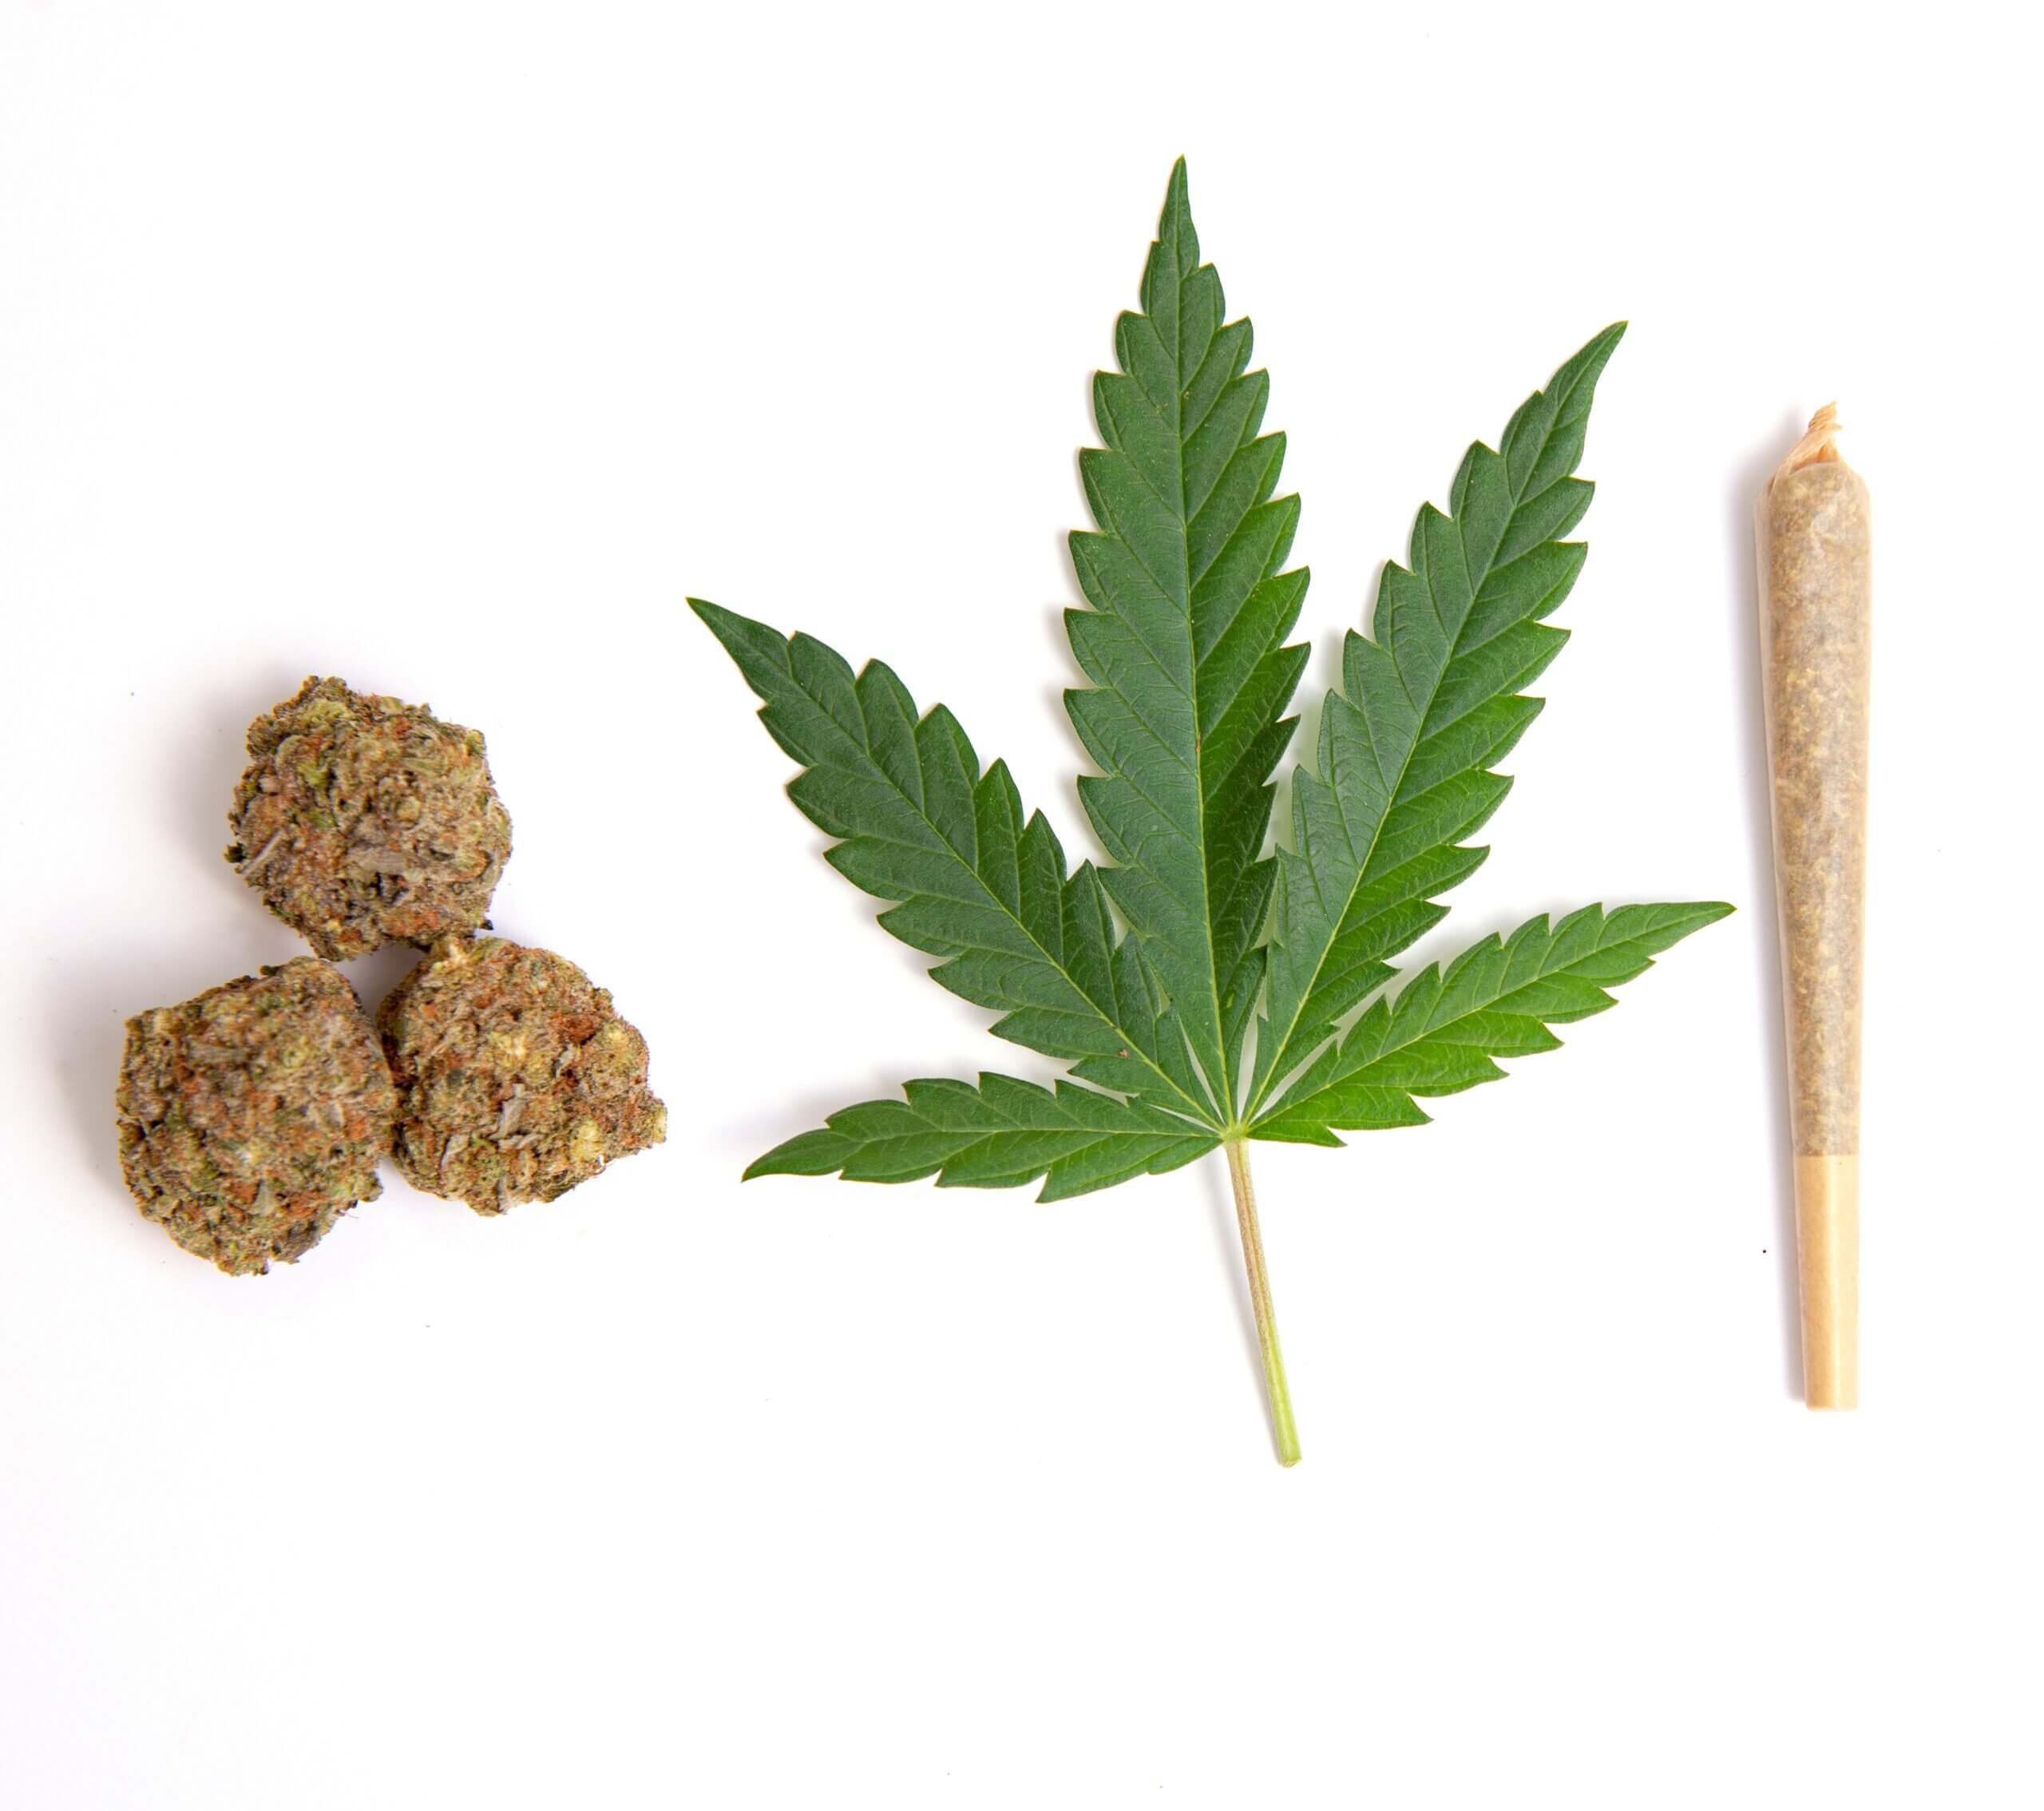
Cannabis is used by people for many reasons including: to relax, feel high, for medical purposes and to help manage mental health symptoms. Cannabis can be consumed in a variety of ways, such as:
inhaled (smoked)
swallowed (in food and drinks)
placed under the tongue (strips and sprays)
applied to the skin (oils and creams)
Safety tips
If you’re using cannabis to manage your stress, anxiety, depression or other mental health symptoms, the best choice is to seek other supports. Talk to your health care provider.
Even though cannabis is legal in Manitoba, there is no amount that is safe during fertility planning, pregnancy and breastfeeding/chestfeeding.
Cannabis use affects health, learning, relationships, children and parenting.
Cannabis and Sperm
Cannabis has been shown to reduce the number and quality of sperm, which can make it more difficult for a couple to become pregnant.
Cannabis and Pregnancy
Cannabis use in all forms, such as Delta-9-tetrahydrocannabinol (THC) and Cannabidiol (CBD) may affect the way your unborn baby’s brain develops. This can result in mental illness, learning and behavioral problems. Some of the effects, such as poor impulse control and hyperactivity, can last into adulthood.
Like tobacco, smoking cannabis reduces the supply of oxygen and nutrients to your unborn baby. This can result in slower growth of your unborn baby, premature birth and a lower birth weight.
Safety tips
Because there is no known safe amount cannabis in pregnancy, it is best to avoid it completely.
If you choose to use cannabis despite the risks, use as little as possible.
Cannabis and Morning Sickness
Some pregnant persons use cannabis to treat morning sickness. There is no evidence that cannabis is useful for morning sickness. Ask your health care provider to help you find the best option for safer treatments. Also check out our article for tips on coping with morning sickness.
Cannabis and Breastfeeding/Chestfeeding
When you use cannabis, the psychoactive chemical called THC is stored in your fat cells (like your brain and breast tissue/chest tissue). When your baby breastfeeds/chestfeeds, THC is passed through your breastmilk/chestmilk and enters your baby’s brain and body, where it can remain for weeks. When a baby is exposed to cannabis through breastmilk/chestmilk, the effects are similar to when a baby is exposed during pregnancy. The baby may have sleep problems, be fussier and startle easily. As the baby grows, they may have problems with memory, reasoning, focusing and be easily distracted.
The healthiest choice for your baby is to breastfeed/chestfeed and avoid cannabis use. For more information on breast/chestfeeding your baby click here.
If you choose to use cannabis while breastfeeding/chestfeeding despite the risks, use as little as possible.
Your baby will spend a lot of time sleeping. It is important to create a safe space for every sleep.
Sudden Unexpected Infant Death (SUID) is a term that refers to all causes of sudden infant death during sleep. This includes accidental deaths caused by suffocation or strangulation and Sudden Infant Death Syndrome (SIDS) when the cause is not known.
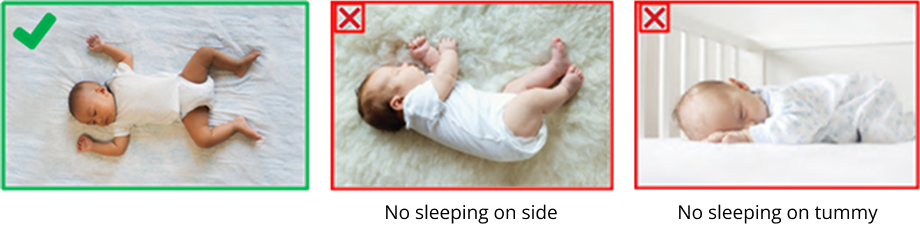
Place Baby on Their Back for Every Sleep
Infants that sleep on their back can breathe better and are less likely to choke or suffocate (stop breathing) than infants who sleep on their tummy or side.
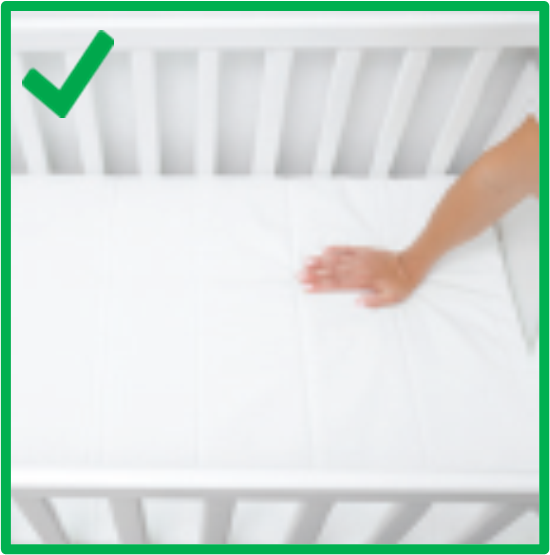
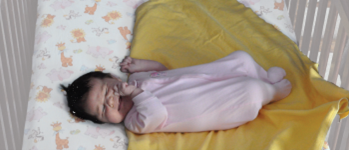
Safe Sleep Environment for Every Sleep
Providing a safe sleep space for your baby for every sleep is the best way to keep them safe and comfortable.
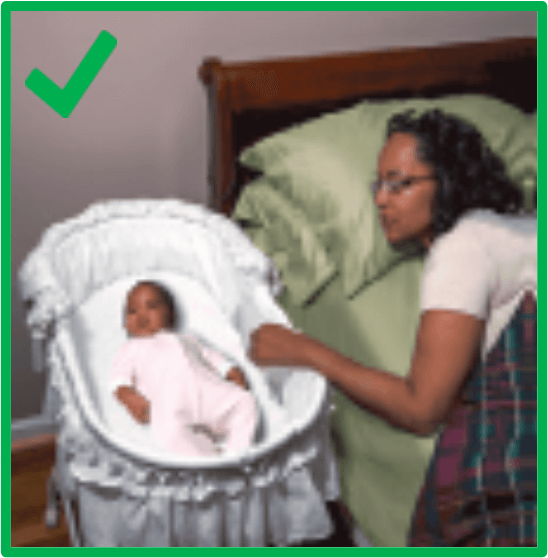
A crib, cradle or bassinet are safe sleep spaces. They can be purchased new or used but should meet Health Canada standards.
The mattress must be:
Firm
Flat
The right size for crib, cradle or bassinet
Sleeping in the same room as your baby helps you attend to their needs and to bond with your baby.
Place crib in your room
The safest place for a baby to sleep is in a crib, cradle or bassinet in your room for the first six months, or ideally, for the first year.
Avoid overheating
Dress baby in sleeper
Use a sleep sack or wearable blanket for extra warmth
Keep room temperature comfortable, not hot
Hats can make most babies too hot
See Safer Swaddling Tips below
While it may seem comforting to include other items in the crib, it is best for baby to sleep without:
Pillows or bumper pads
Bottles
Stuffed animals or toys
Sleep postioners
Loose blankets or quilts
Also, baby should not have anything around their neck for sleeping such as jewelry, teething necklaces, bibs or soother strings
Other Sleep Safe Options
The safest place for a baby to sleep is in a crib, cradle or bassinet. Playpens usually do not meet Canadian safe sleep recommendations. Bassinets that are sold with some playpens are a safer, lower cost choice.
Parents may use other options below for a temporary sleep space. Talk to your health-care provider to make sure it is as safe as possible.
All sleep spaces should be kept:
On the floor to avoid the risk of falling
Away from baseboard or portable heaters, fireplaces, wood stoves, ovens and other sources of heat
Away from pets. Pets may wish to snuggle and can accidentally smother the baby.
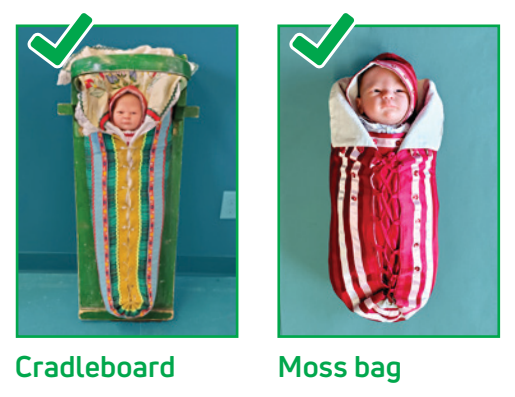
Ask a knowledge keeper about safe use of cradleboards and moss bags
Check out this video on safe sleep from The First Nations Health and Social Secretariat of Manitoba.
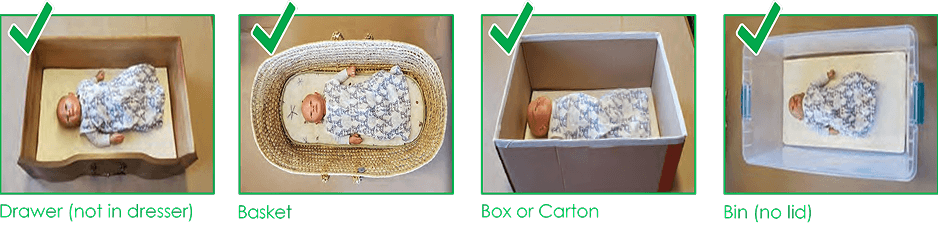
If you do not have a crib, cradle or bassinet, you can make a safe sleep space for your baby with some very simple household items such as a drawer (pulled out from the dresser), a basket, a box or a bin (without a lid). Your baby can sleep comfortably and safely in these homemade sleep spaces.
For tips on making these temporary sleep spaces and making a mattress, call your health-care provider, your public health office or visit our other pages on parentinginmanitoba.ca
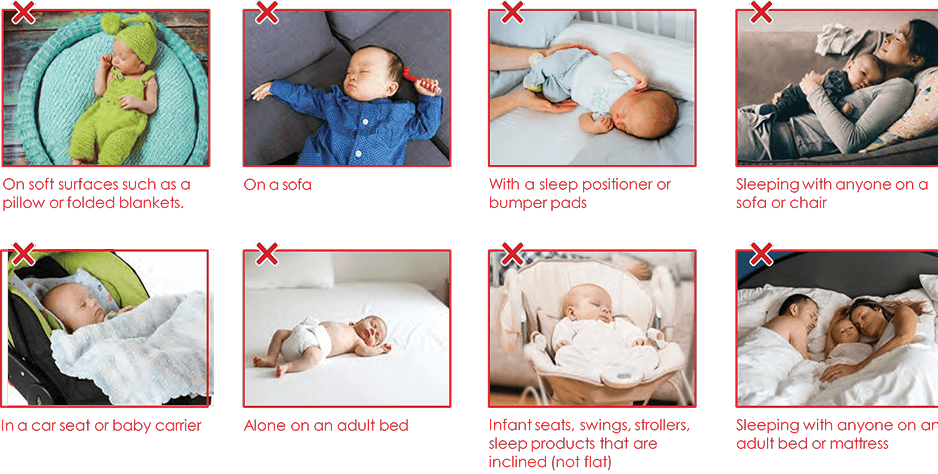
Unsafe sleep spaces
Remember your ABCs!
Baby should sleep:
Alone On their Back In a Crib (cradle, bassinet, safe sleep space)
It is important for baby to always sleep alone, on their back and in a safe sleep space with a firm flat mattress and sides that will prevent the baby from rolling/falling out.
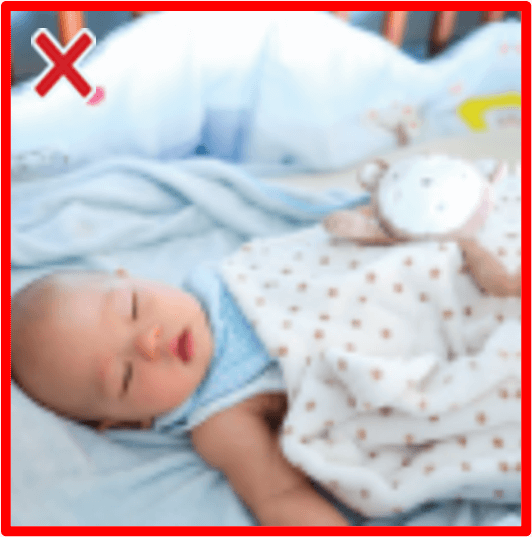
Baby should sleep alone. Bed-sharing in the same sleep space such as a bed has risks. Adults, other children or pets can accidentally hurt the baby or make it hard for the baby to breathe. If you decide bed-sharing is best for you and your baby, see safer bed-sharing below.
Babies should sleep on their backs. Sleeping on their side or tummy can make it hard for your baby to breathe. Surfaces that are sloped (not flat) may cause the baby to roll into an unsafe sleep position. Baby’s head can also slump forward, making it hard for the baby to breathe.
Soft surfaces do not support the baby to lay flat and in the best position for breathing. Soft materials, such as blankets could cover the baby’s face, making it hard for them to breathe.
Surfaces like couches or an adult bed are risky as they may be too soft for baby to be in a good sleeping position and the baby may roll off and fall, become trapped between the mattress and cushions, or the cushions or material may make it difficult for baby to breathe.
Images with an X are not safe sleep spaces. Sharing any sleep surface with your baby is unsafe
Safer Bed-Sharing
Babies are safest in their own sleep space like a crib, cradle or bassinet.
If you do not have a crib, cradle or bassinet, contact your health care provider or public health office who will work with you to find a solution. You can also make a safe sleep space out of common household items (see above).
Some families choose to have their baby sleep in their bed with them.
Use this checklist to bed-share more safely.
Baby sleeps on back directly on a firm mattress. Co-sleepers, car seats, or infant seats are not safe sleep spaces.
Parent’s long hair is tied up and away from baby’s face.
Bedding and sheets are pulled low enough so that there is no risk of blankets or sheets covering the baby’s face.
Bed is away from the wall and other furniture so baby can’t get trapped between the bed and a firm surface.
Baby is not swaddled. Use a sleep sack if needed.
Baby is placed on the side of one parent. Both parents know that the baby is in the bed. Baby is never in the middle of two adults or next to other children or pets.
No soft bedding such as comforters and pillows near baby
Room temperature is cool and comfortable so that baby doesn’t overheat
When Not to Bed-share
If your baby:
Was born at less than 37 weeks (pre-mature, or born early)
Was small at birth (weighed less than 2.5 kilograms or 5.5 pounds)
Is under four months of age, when the risk of suffocation (not breathing) and sudden unexpected infant death is highest
If you or your partner:
Smoke, if there is any smoking in the home or if you smoked during pregnancy
Are overly tired or are sick
Have been drinking alcohol
Have taken any medications or drugs that make you feel sleepy
Are obese
Sleep Sacks and Sleepwear
There are many types of swaddles, blankets and sleep sacks on the market. Choose the right size for baby and always follow the manufacturer’s instructions.
Not all are safe.
Choose safer ones that:
Are snug around the upper body so that baby is unable to wiggle out
Are not tight around baby’s chest. You should be able to get two fingers between baby’s chest and the sack
Are loose around the hips. Your baby’s legs should bend and move comfortably.
Have no choking hazards like snaps, buttons
Meet children’s sleepwear flammability standards.
Remember, outdoor wear is not designed for sleep. Day clothes may have zippers, hoods and strings that are also not appropriate for sleeping or meet Health Canada’s flammability standards.
Most sleepwear in Canada is safe. However, be cautious of clothing purchased in other countries, vintage clothing, novelty wear (like costumes) and homemade/crafted sleepwear as the material may not meet Canada’s fabric sleepwear standards.
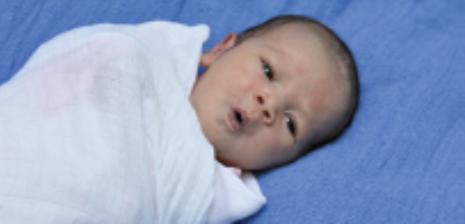
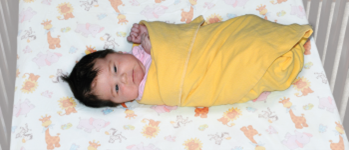
Safer Swaddling
Most babies are warm enough in just a sleeper, or with a wearable blanket or swaddler if they need extra warmth. Swaddled babies can become overheated. The swaddle can also become loose and cover the baby’s mouth and nose, making it hard to breathe.
If you choose to swaddle your baby, follow these tips to help keep them safer.
When choosing a swaddle wrap, look for:
Light, breathable fabric such as cotton with a loose weave. Avoid heavy blankets.
No drawstrings, ribbons, cords or tight elastic.
No buttons, snaps or decorations.
Choose the right swaddling technique for your baby’s age:
For younger babies (birth until three months old), wrap the arms in the swaddle with baby’s elbows bent and hands close to the chin.
For older babies (about three to six months old and babies who can roll), leave their arms free.
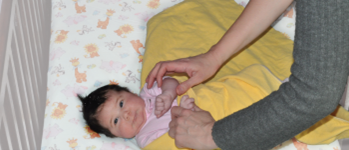
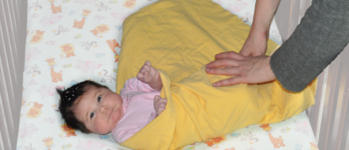
How to safely swaddle a baby
Spread the wrap out with one corner folded. Lay baby on wrap.
Bring baby’s hands together over their chest. Bring one side of the wrap over their arms and tuck under baby.
Fold the bottom of the wrap up, leaving room for baby’s feet to move.
Bring the second side of the wrap across baby and tuck the end behind baby.
Follow these tips to keep baby safer
Keep baby on their back
Don’t let baby get too hot
Make sure that the blanket or swaddle doesn’t cover their face
Keep swaddle loose at the hips and legs. Babies who do not have their legs free to bend and kick can suffer abnormal hip development.
When baby can roll over, stop swaddling or wrap baby with arms free.
Other practices to protect against SIDS
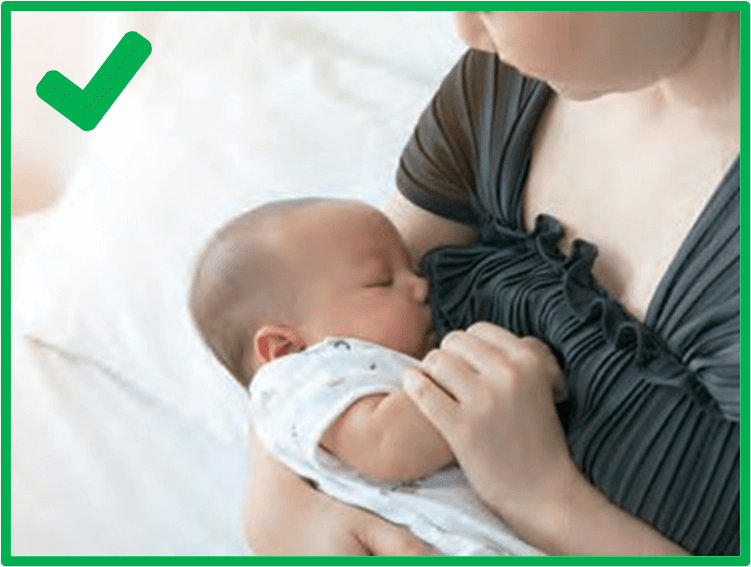
Breastfeeding/Chestfeeding Protects Baby
Breastfeeding/chestfeeding lowers the risk of SIDS. Breastmilk/chestmilk boosts infants’ immune systems, supports their brain development and helps them wake up from sleep easier.
Once breastfeeding/chestfeeding is established, consider using a pacifier (soother), which may reduce the risk of SIDS.
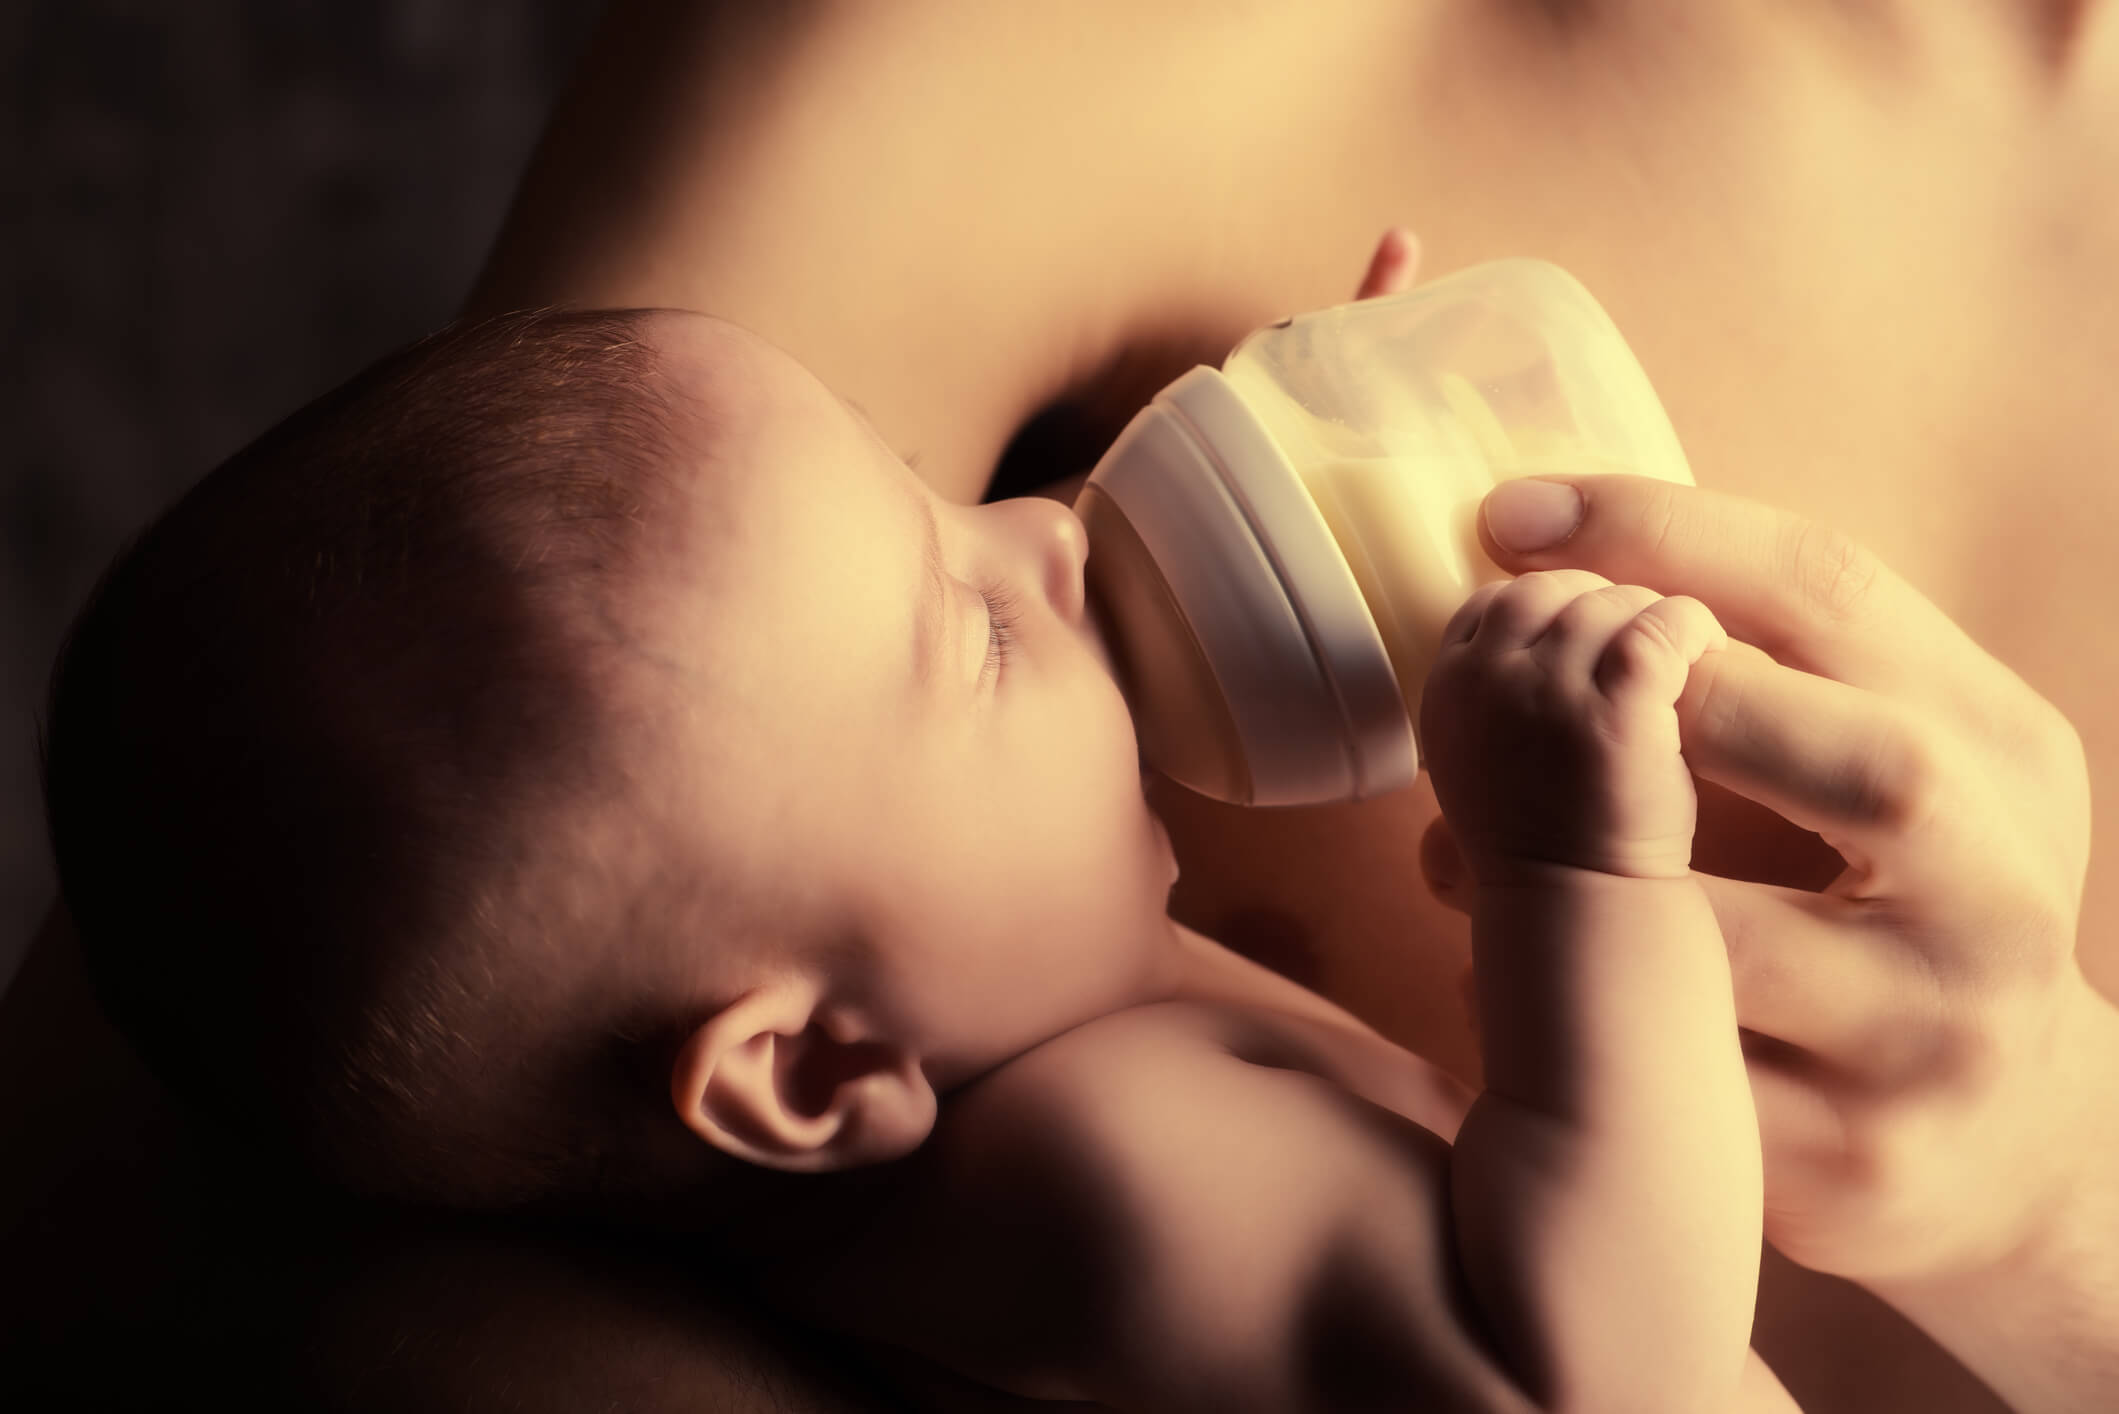
While not everyone can or wants to breastfeed/chestfeed you can still protect your baby if you are bottle-feeding by following all of the other tips in this article.
When bottle feeding always hold your baby and the bottle to prevent your baby from choking. No matter how you feed your baby, always place your baby back to sleep in a crib, cradle or bassinet.
Keep baby smoke-free before and after birth
Smoke exposure increases the risk of SIDS. Tobacco smoke contains several toxic chemicals that can damage the cells of the body. It can affect infant brain and lung development. This can affect how an infant breathes and may increase the risk of SIDS.
It is safest for a home to be smoke free. If you smoke, do it outside, wash your hands and change your clothes before holding your baby. It is safest to avoid using alcohol, tobacco, vaping products, cannabis and other drugs while trying to become pregnant, during pregnancy and while breastfeeding/chestfeeding.
For support with quitting or cutting down visit Smoker’s helpline or call them at 1-877-513-5333, Tobacco Has No Place Here, NUQUITS and/or talk to your health-care provider
For help with other substances call Manitoba Addictions Helpline – 1-855-662-6605
For more information on safe sleep, bed-sharing, swaddling, sleep sacks and other child health and safety topics, contact your primary care provider, your public health officeor see our other articles on parentinginmanitoba.ca.
Check Health Canada’s website for recalls on baby equipment including sleepwear, cribs, cradles and car seats. Visit healthycanadians.gc.ca.
It’s common to need time to adapt when you are pregnant or have a new baby in your life. Many parents expect to feel happy with the arrival of a new baby and are surprised if they feel sad, anxious, angry or overwhelmed. Depression and anxiety can affect any new parent and can start during pregnancy or any time in your baby’s first year of life.
If you are going through postpartum depression or anxiety, you are not alone. Many parents don’t talk about how they are feeling because they are afraid others will think they are not able to care for their baby. This is not your fault. There is help and there is hope.
The Baby Blues
Up to 75 per cent of people who give birth experience the baby blues. The baby blues are caused by hormone changes and adjusting to becoming a parent. Baby blues usually last about two weeks. Parents with the baby blues may have mood swings, worry a lot, cry easily, feel tired, overwhelmed or irritable, and have trouble sleeping.
Beyond the Baby Blues
Many new parents experience depression or anxiety. Anyone raising a child can be affected. Often, other people close to you may notice changes in how you are doing and express concern. Sometimes it is hard to know if how you are feeling (e.g., tired or overwhelmed) are symptoms of depression or common adjustments to parenting. It is important to recognize the signs early and talk to a health-care provider so you get the support and care you may need.
Signs of Postpartum Depression and Anxiety
Postpartum depression and anxiety can be different for each person. Talk to a health-care provider if:
No interest in activities and relationships you usually enjoy
Can’t stop crying
Postpartum Depression Can Be Treated
If you think you have depression or anxiety talk to a health-care provider. The sooner you get help, the sooner you will feel better. Therapy, counseling, support groups and/or medication can help. Treatment can look different for each family. In addition to treatment, you can help yourself by:
Being kind to yourself
Don’t pressure yourself to do everything you used to do
Do what you can and leave the rest
Asking for help
Take friends and family up on offers to help with laundry, cooking or taking care of baby so you can rest or get out of the house
Taking care of your body
Rest when you can
Be physically active
Eat healthy foods
Avoid alcohol
Making time to recharge
Do something you enjoy
Stay connected
Spend time with your partner, family or friends
How to Support Someone with Postpartum Depression
If you think your partner or friend is experiencing postpartum depression or anxiety, tell them about your concerns. Be supportive and positive and avoid shaming or blaming the person.
Encourage them to talk to a health-care provider as soon as possible and offer to go with them to appointments.
Encourage them to talk about their feelings. Validate and reassure them.
Ask family and friends for their understanding and support.
Take care of the baby so they can rest.
Do skin-to-skin contact with the baby so they can rest.
Help with the daily housework and chores.
Postpartum depression and anxiety can be treated.
If you think you have postpartum depression or anxiety, here is where to get help:
Your health-care provider, public health nurse, midwife, health centre or nursing station
If you are feeling out of control, like you are not coping or having thoughts of harming yourself or your baby, this is a medical crisis. Put your baby in a safe place, get someone to watch them and call:
Deciding how to feed your baby is one of many big decisions you will make as a parent. Breastmilk/chestmilk is the ideal food for babies and contains almost all the nutrients your baby needs for the first six months. Whether you breastfeed/chestfeed or formula feed, the only extra thing your baby should need is vitamin D. If you are considering formula feeding your baby in their first year of life, here is some information on how much it may cost.
The Average Cost of Infant Formula in Manitoba
The table below shows the average cost of formula feeding a baby for one year in Manitoba based on the summer/fall prices of 2023. These prices may change over time and do not include the cost of baby bottles and other equipment you may need to sterilize waterand prepare formula.
Average cost of formula for one year in Manitoba
Powder
Liquid Concentrate
Ready-to-Feed
$1,939.70
$2,098.42
$5,685.20
Data collection: From July to October 23 | Amounts based on an average intake of 750 millilitres of formula per day. Average formula costs were calculated based on basic infant formula across the province. We collected data from a minimum of four stores in each health region. If you choose to buy powdered formula with omega 3 fats and probiotics, it may cost more than the average calculated amount here.
Which Formula Should I Choose?
There are many types and brands of formula on the market. Choose what works best for your situation unless your health-care provider says your baby needs a special formula.
If you choose to feed your baby formula, your baby will most likely be given a brand name ready-to-feed formula in the hospital or birth centre. You don’t need to continue using this brand or type of formula.
Powdered formula is usually the least expensive type of formula; however, it is not sterile. Ready-to-feed formula is the most expensive. For more information on the different types of formula and any special considerations, click here.
Other Milks and Homemade Recipes Are Not Recommended
Cow’s milk, goat’s milk, plant-based beverages (such as soy, almond or oat beverage), evaporated milk, condensed milk and homemade recipes are not to be used in place of commercial infant formula. They do not contain the right amount of nutrients for the healthy growth and development of your baby.
How to Compare the Cost of Different Brands
With so many choices, you may be wondering how to choose what to feed your baby. All infant formulas sold in Canadian stores are regulated by Health Canada and are required to contain the nutrients your baby needs to grow and develop. See the Regular Infant Formulas List for other brands of formula in the same category. Store brands are usually less expensive. If you are unsure, ask your public health nurse, midwife or health-care provider.
Comparing the cost of different brands, formats and sizes of formulas can get confusing. To compare standard amounts, you can calculate the number of bottles (also known as servings) each one will make. Sometimes this information is provided on the label of the formula, but often it is not. For an example, see the table below which compares the different formats and sizes of a single brand of formula. For comparison, the ready-to-feed bottle size is used in the table below (8 oz/237 ml). Young infants will drink less than this.
Product
Product Size
Number of 237 ml bottles this product will make
Product Price
Price per 237 ml bottle
Ready-to-use
18 x 237 ml (8 oz) bottles
18
$75
$4.17
Concentrate*
12 x 385 ml
38
$72
$1.89
Powder**
550 g
16
$44
$2.75
Powder**
663 g
19
$44
$2.31
Powder**
992 g
28
$61
$2.17
*Liquid concentrate formula: Prepared by adding the same amount of water as formula according to the manufacturer’s instructions. **One scoop = 8.8 grams. One scoop makes 60 millilitres of formula. Scoop sizes vary by brand of formula. It is important to always follow the manufacturer’s instructions to prepare.Do not add extra water to make it last longer.
Cost-Saving Shopping Tips
When comparing the price of different formulas and brands, look at the product’s price per 100 millilitres or per 100 grams to find the cheapest option. Some stores will list this amount on the shelf label or on their website for online shopping.
Check prices and watch for sales in different store flyers and websites.
Consider buying store brands. These can be much less expensive than brand names.
Use coupons available from the formula manufacturer’s website, grocery stores or coupon apps.
Look for “subscribe and save” discount offers on formula from online retailers.
If you’ve found a formula that your baby tolerates well, look for it in larger or bulk sizes which are often lower in unit price than smaller containers.
How Long Will My Baby Need Formula?
Your baby will have only formula (and vitamin D) for the first six months and will continue to have formula as they gradually learn to eat solid foods.
Infant formula provides the nutrients your baby needs to grow and develop in their first year. You can begin giving your baby homogenized (“whole”) cow’s milk with 3.25 per cent milk fat (M.F.) at nine to 12 months of age if they are eating a variety of iron-rich foods. However, cow’s milk does not yet replace formula.
Your baby can transition from formula to homogenized cow’s milk around 12 months.
Did you know?
Toddler (or Stage 2) formula is not needed.
What If I Cannot Afford Formula?
Filing your taxes can also give you access to government benefits such as the Canada Child Benefit. See Get Your Benefits for more information and to apply.
Babies become overheated much more quickly than adults. Babies rely on caregivers to help keep them safe by dressing them properly, keeping them hydrated, and moving them to a cooler place when needed. When it’s hot, your baby will need to breastfeed/chestfeed more often. Formula fed babies under six months will need more formula if they are thirsty. You may also offer sips of water from a cup if your baby is older than six months.
Keeping Baby Comfortable Indoors
Dress your baby in an undershirt and diaper or diaper only. Dress your older child in loose-fitting, light-coloured clothing made from a breathable fabric.
Place the crib or bassinet in the coolest room.
A fan can help keep the room cool. Fans should never blow directly on the baby and should be out of baby’s reach.
Mist your baby using a spray bottle filled with cool water or use cool wash cloths to make your baby more comfortable.
Bathe your child in a cool bath until your child feels refreshed. Always supervise your child in the bath.
If you have air conditioning, your home may be cool enough.
If you’re comfortable, then your baby probably is too.
Keeping Baby Comfortable Outdoors
Take a break from the heat by spending a few hours in a cooler place.
When outdoors, look for a shady, breezy place. Tree-shaded areas could be as much as 5ºC/9ºF cooler than the surrounding area.
Infants under six months of age should be kept out of direct sunlight, especially between 10 a.m. and 4 p.m. when the sun’s rays are the strongest.
Keep your child in the shade or protected from the sun by wearing a wide-brimmed, breathable hat or shade them with an umbrella.
If the sun cannot be avoided, cover baby in light long sleeve tops, long pants and a hat.
For babies over six months, it is okay to use sunscreen. Use sunscreen on exposed areas, like face, ears, neck and back of hands. Reapply sunscreen every two hours and after swimming.
Safety Tips:
Never leave a baby or child inside a vehicle. Parking in the shade, opening the window or running the air conditioner will not keep the temperature inside the car at a safe level.
Check that the car seat is not too hot before putting baby in, especially the metal parts which get extremely hot.
If using a baby tent, make sure it has mesh sides for good airflow and place it in the shade if possible. These products can get hot inside so check the temperature often to make sure that your baby isn’t overheating.
If you are draping a cloth over the stroller to help shade your baby, choose a cloth that is light-coloured, and made of lightweight, breathable fabric. Check the temperature in the stroller often to make sure that your baby isn’t overheating.
Your baby might be too hot if they…
feel hot to you (check the back of the neck and abdomen)
are sweating
have a heat rash (looks like tiny pink pimples surrounded by pink skin)
look unwell
become floppy, weak or less active
are irritable
have skin that feels dry
refuse to drink
have fewer wet diapers than usual
If your baby is hot
Breastfeed/chestfeed more often
Bottle-fed babies may need extra formula
You may offer sips of water from a cup if your baby is older than 6 months and taking solids
Take baby to a cooler location
About Heat Stroke
Heat stroke occurs when the body overheats and loses too much water.
Heat stroke can damage the body’s organs and cause death and is a medical emergency.
Seek immediate medical care. Call 911 or your local emergency number right away, or take your baby to the nearest hospital, nursing station or health centre
While waiting for medical treatment: move baby to the shade or indoors and use damp cloths to cool your baby down.
If your baby is conscious and able to swallow, try to get them to breastfeed/chestfeed or drink fluids.
Signs of heat stroke include:
rising body temperature
less urine than usual
increased thirst (but as baby gets weaker, he or she may drink less)
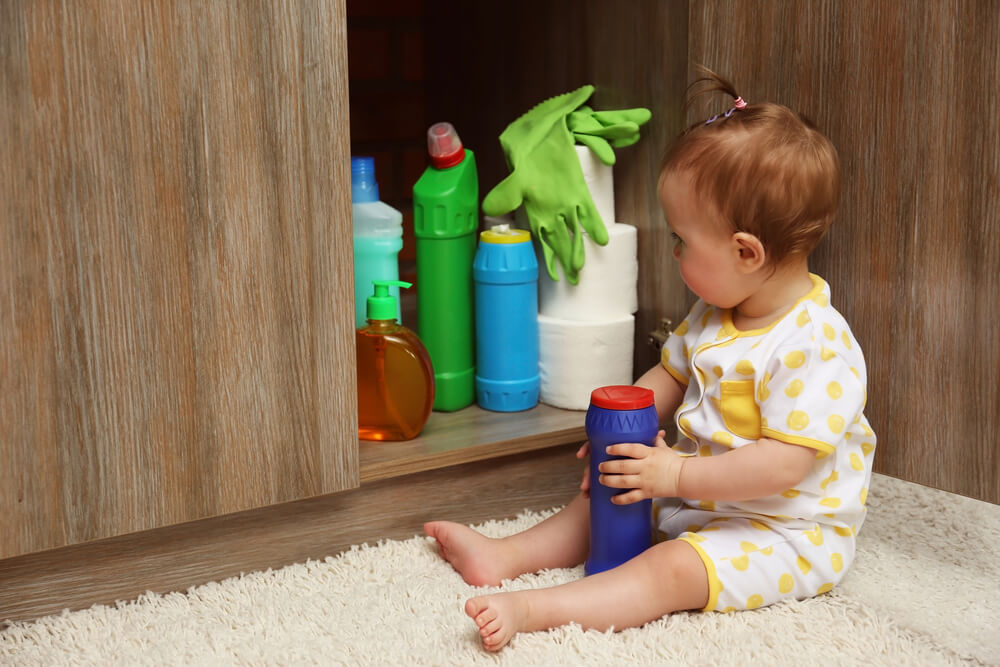
Many things in our homes put young children at risk of poisoning. Medications, cleaning products, personal care products and some household plants can all be poisonous to a young child. Even a small amount can make your child very sick. To a child, some common household products can look like candy, juice or chewing gum.
Parents should go through every room to check for poisons.
Note: Other videos may be recommended by the host channel (e.g. YouTube, Vimeo). These suggestions may be based on your personal search history and other factors. The Manitoba Government does not control these suggestions and is not responsible for and may not endorse the content.
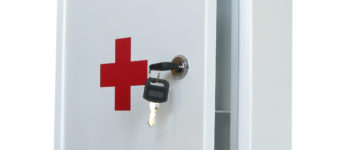
Keep all potential poisons locked up high, out of sight and out of reach
As your child grows, they become more active and can more easily reach and open cabinets.
Make your home a poison-safe zone by storing all potential poisons in a high-up cabinet, drawer or cupboard that can be locked using a lock (with the key stored in a hidden location) or with a latch that cannot be opened by a child.
Store products in their original containers and teach older children hazard symbols on containers.
Medications
Tips to prevent poisoning from medications:
Store medications “out of sight and locked up tight” so that children do not have access to them. The best choice is a locked box kept out of your child’s reach.
Lock up medications with child resistant caps as well, as some children can take the caps off.
It is best to use the original, labelled container that makes it clear what is inside and has the dosage information you may need.
Do not call medicine or vitamins candy.
Be extra careful with medicines that may taste good to your child, such as chewable vitamins and fruit-flavoured syrups. Children learn by touching, tasting and by imitating others.
When giving your child medicine, check the label to make sure you are giving the correct amount.
Keep products in their original containers to help you remember the medication and the dosage.
Keep visitors’ purses and bags out of your child’s reach as they may have poisonous products in them.
Visitors may have potentially poisonous products with them, such as medication, vitamins, cosmetics or cannabis products.
Other products that cause poisoning
vitamins
household cleaners and other chemicals, such as bleach
laundry detergent, including single-dose pods.
Laundry pods can look like candy and appeal to children, but they can cause burns and illness. It is safest to use powdered or liquid detergents.
personal care products, such as mouthwash or nail polish, nail polish remover, perfumes, and aftershaves
car supplies, such as antifreeze and windshield washer fluid
alcohol
nicotine (cigarettes) and vape juice (the liquid used in e-cigarettes)
cannabis, including cannabis edibles that may look like a harmless snack to your child
illicit drugs, such as opioids
pesticides
certain plants, such as mistletoe, holly berries and poinsettias
Tips to prevent plant poisoning
While children benefit from outdoor play and learning about how plants grow, some can be poisonous if eaten or cause irritation if touched.
Know all plants in and around your home and yard.
Label each plant in your home with the specific name (e.g., Devil’s ivy vs. just ivy).
Keep all houseplants, seeds and bulbs out of reach of children.
Teach children to never put leaves, flowers, seeds, nuts, wild mushrooms or berries in their mouths without first checking with an adult.
Did you know?
Poison centres across Canada received more than 200,000 calls in 2023, and 66,000 calls were related to children under six.
It’s a good idea to keep the number of your poison centre nearby or in your phone. Program the number into your phone’s contact list or keep it in a visible location, such as on your fridge.
If you think that your child may have swallowed something poisonous
In the event your child or someone else in your household is potentially poisoned, contact the Manitoba Poison Centre. If the person loses consciousness or has difficulty breathing, call 911.
If your child is awake and alert, call the Manitoba Poison Centre at 1-855-776-4766. Emergency responders will want to know…
your child’s age and weight
what was swallowed (show them the container of medication or poison if possible)
Drowning is a leading cause of injury-related death for Canadians, and it often happens quickly and silently. In Manitoba, on average, there are 23 fatal drownings every year. Many of these drownings happen in bathtubs, backyard pools, lakes and rivers. Practice being safe around water in nature and in a backyard.
Children are at higher risk for drowning
All children are at risk for drowning, but young children under five years old are at higher risk because they:
are attracted to water but unable to understand the danger
can walk but not swim
are still developing balance and co-ordination
have smaller lungs than adults
can drown in as little as 2.5 centimetres (one inch) of water
Children should never be left alone
In all recent Manitoba drownings of young children, there was either no adult supervision or the adult was distracted (present, but not watching the child). Children should never be left alone in or near water, including the bathtub, even for a moment.
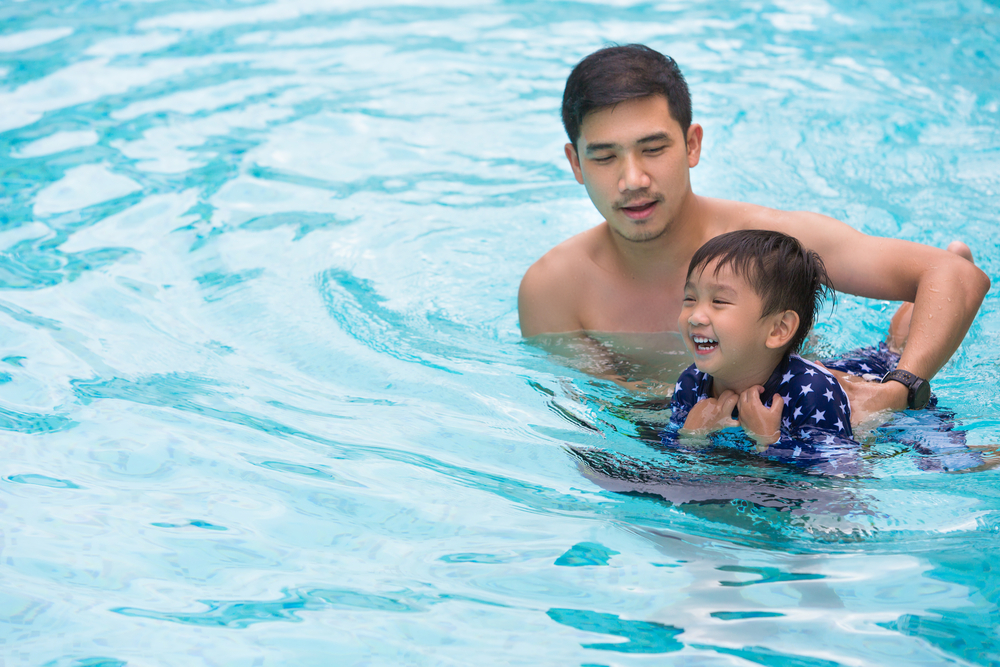
All children should be supervised by an adult when they are in or around water.
It is best that the adult knows how to swim and has been trained in CPR. Do not leave older children (under the age of 16) to supervise younger siblings.
The adult must be in the water with young children. Supervising from the beach or pool deck is not close or safe enough.
The Manitoba Lifesaving Society recommends a supervision ratio of at least one adult for every baby and one adult for every two young children.
Babies should always be held by an adult at all times. In Canada, approved life jackets and PFDs are not available for infants who weigh less than nine kilograms (20 pounds).
Toddlers should always be within arms’ reach of an adult when they are in or around water. This includes bathtubs, pools (including wading pools), lakes and rivers.
Water safety around your yard
Supervision is still the most important thing you can do to prevent drowning.
Stay within arms’ reach of your child around pools, ponds and hot tubs and never leave them unattended.
Empty buckets, pails or coolers as soon as you are done with them.
If you have a rain barrel, make sure it is child resistant and labeled as such. Store empty containers upside down so they do not fill up with rainwater.
Toddler pools
Use diapers designed for use in water. Regular diapers get heavy, come apart and can cause your child to lose their balance.
Empty toddler and other portable backyard pools after use. Store toddler pools upside down when they are not in use so they do not fill up with rainwater.
Swimming pools (in- or above-ground) and hot tubs
Parents and pool owners should learn how to swim and how to rescue a drowning victim. They should get trained and stay certified in first aid and CPR.
Pool owners should have:
an emergency action plan
rescue equipment including a first aid kit, reaching pole and ring buoy attached to a rope
a telephone on the deck or poolside
Pools should be fenced on four sides so that children do not have easy access to the pool. It is safest if the house is not used as one of the sides. Gates to the pool area should be self-closing and self-latching. Check with your municipality about regulations for pools, spas and hot tubs. In-ground and above-ground pools, hot tubs or spas that are 24 inches or deeper require a development and a building permit.
If your hot tub or spa is not fenced in, it should have a locking hard cover or be in an area that can be closed and locked. Infants and toddlers should not use hot tubs because they overheat too quickly and cannot tell you if they feel dizzy or too hot.
Slide or play equipment should be designed specifically for pool use. Teach children to slide in a sitting position.
What about public pools and spray pads?
It is important to supervise your children even if there are lifeguards on duty.
Teach your children these important swimming pool rules and always follow them:
no swimming without an adult
no running or pushing
young children and non-swimmers always wear a personal flotation device (PFD)
Getting training is important
Get trained in CPR (cardiopulmonary resuscitation), first aid, water rescue and swimming skills. These forms of training can help you to safely help others who are in trouble. Every year, people die when they try to rescue others in the water because they weren’t trained in water rescue.
Should I use a life jacket or personal flotation device (PFD) on my child?
Yes, along with supervision, adding a lifejacket or a personal flotation device (PFD) makes your child safer. Here is the difference between a lifejacket and a PFD:
A life jacket can turn the person over from face-down to face-up.
A PFD will keep a person floating, but not necessarily face-up.
PFDs or life jackets should be worn by all infants who weigh at least 9 kilograms (20 pounds) and by toddlers who are swimming or playing near or in the water.
It should be the right size for your child’s weight.
Make sure it stays buckled up.
Keep all safety straps fastened, including the crotch strap.
Check the label to be sure that your child’s PFD or life jacket meets current national safety standards. It should be approved by at least one of the following: Transport Canada, Canadian Coast Guard or Fisheries and Oceans Canada.
Remember that water wings, neck rings, bathing suits with flotation devices in them and other swim toys are not safety devices.
Did you know?
Manitoba Parks loans life jackets to visitors! See Life-jacket Loan Program for more information.
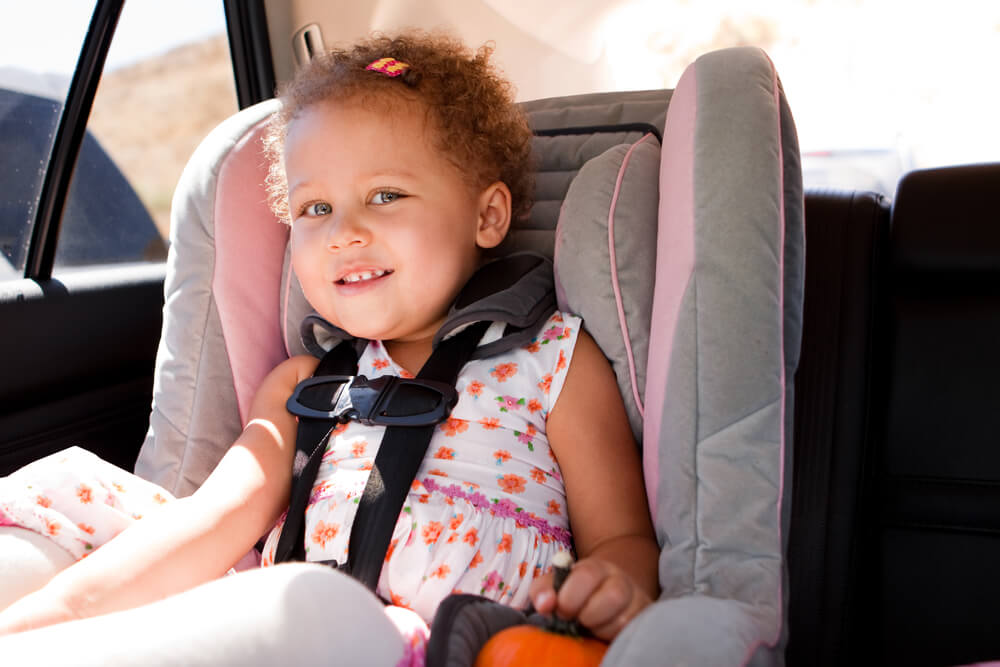
Car seats help keep your child safe in a motor vehicle.
In Manitoba, all child passengers must ride in a child car seat or booster seat until they are at least:
145 centimetres (four feet nine inches) tall, OR
36 kilograms (80 pounds) in weight OR
nine years of age
It is safest to keep your child rear-facing as long as possible – your child may be two years old or more. To keep your child rear-facing longer, get a convertible car seat that can eventually be used forward-facing. Look for one with a higher rear-facing limit. Some seats have rear-facing weight limits up to 22.7 kilograms (50 pounds).
Move your child to a forward-facing seat once they have outgrown the height or weight limits of the rear-facing car seat. Many rear-facing seats are outgrown when the top of the child’s head is 2.5 centimetres (one inch) below the top of the car seat.
Which forward-facing car seat should I use?
If you already have a convertible car seat that can be used rear- and forward-facing, you can install the seat forward-facing. Only do this once your child has outgrown the rear-facing height or weight limit.
If you are buying a car seat, choose a forward-facing seat that will meet the weight and height of your child for as long as possible. Some seats are made for children up to 29.5 kilograms (65 pounds).
You can buy a convertible car seat that can be used as forward-facing seat and then as a booster seat.
Follow the car seat and vehicle’s manuals for instructions on installation.
Car seat accessories (including head positioners, harness covers and seat protectors) that are sold separately from the car seat are not recommended, because they can affect how well the car seat protects your child in a cash.
Check the expiry date on the car seat.
Look for Transport Canada’s National Safety Mark on the car seat. Car seats sold in the United States will not have this seal and are not approved for use in Canada.
Are second-hand (used) car seats safe?
They can be. Avoid a used car seat that:
has been in a crash or you don’t know if it has been in a crash
All children under 13 years of age should ride in the back seat of the vehicle.
The safest place in the vehicle to install the car seat is in the middle of the back seat.
Follow the owner’s manuals for your vehicle and car seat for proper installation of your specific car seat. Some manufacturers have videos online to help you.
The tether strap must always be used to secure the top of the car seat to the vehicle. Your vehicle manual will tell you where the anchors are in your car, truck or van.
You can use the UAS (Universal Anchorage System) in your car or the seatbelt to install the car seat, but use the UAS if at all possible. Check your car owner’s manual to see if UAS can be used to install the car seat in the center position.
UAS systems have a weight limit which includes your child’s weight and the weight of the car seat. Once your child reaches 18 kilograms (40 pounds), check your vehicle’s and your car seat’s instructions for the maximum weight allowed for the UAS and how to safely secure the car seat.
If you cannot find your manuals, and your child weighs 18 kilograms (40 pounds) or more, Transport Canada recommends that you install the child car seat using both the UAS (if equipped) and vehicle seat belt.
Always use the top tether anchor for a forward-facing car seat whether you’re using the UAS, the vehicle seat belt or both.
How do I know if my child is harnessed safely?
Follow the manufacturer’s instructions for securing your child into the car seat.
Tighten the straps so that you can only fit one finger between your child’s collarbone and the harness straps. Adjust the straps as your child grows.
In the winter, you can dress your child in a snowsuit. Choose snowsuits or jackets that are not puffy and are not made from slippery material. Make sure when you are tightening the harness straps that you squeeze the snowsuit so that you can only fit one finger between the snowsuit and the straps.
When is my child ready for a booster seat?
Do not be in a rush to move your child to a booster seat.
Wait until your child has outgrown the height or weight limit of the forward-facing seat. This information is found on the labels on the side of your car seat and in the owner’s manual.
Many forward-facing seats are outgrown when the harness straps are no longer at or above the child’s shoulders.
If your child has outgrown the height or weight limits of the seat but is not ready for a booster, you will need to get a seat with a harness that has a higher height and weight limit.
You are leaving the Parenting in Manitoba website. The Government of Manitoba is not responsible for the content or security of third-party websites. Go BackContinue
Vous quittez à présent le site Web Être parent au Manitoba. Le gouvernement du Manitoba n’est pas responsable du contenu ni de la sécurité des sites Web tiers. RetourneContinuer